A Classic Second Story Addition
Budde-37.jpg
37 wilshire ft.JPG

Before

1-story; 2 bed/ 2bath
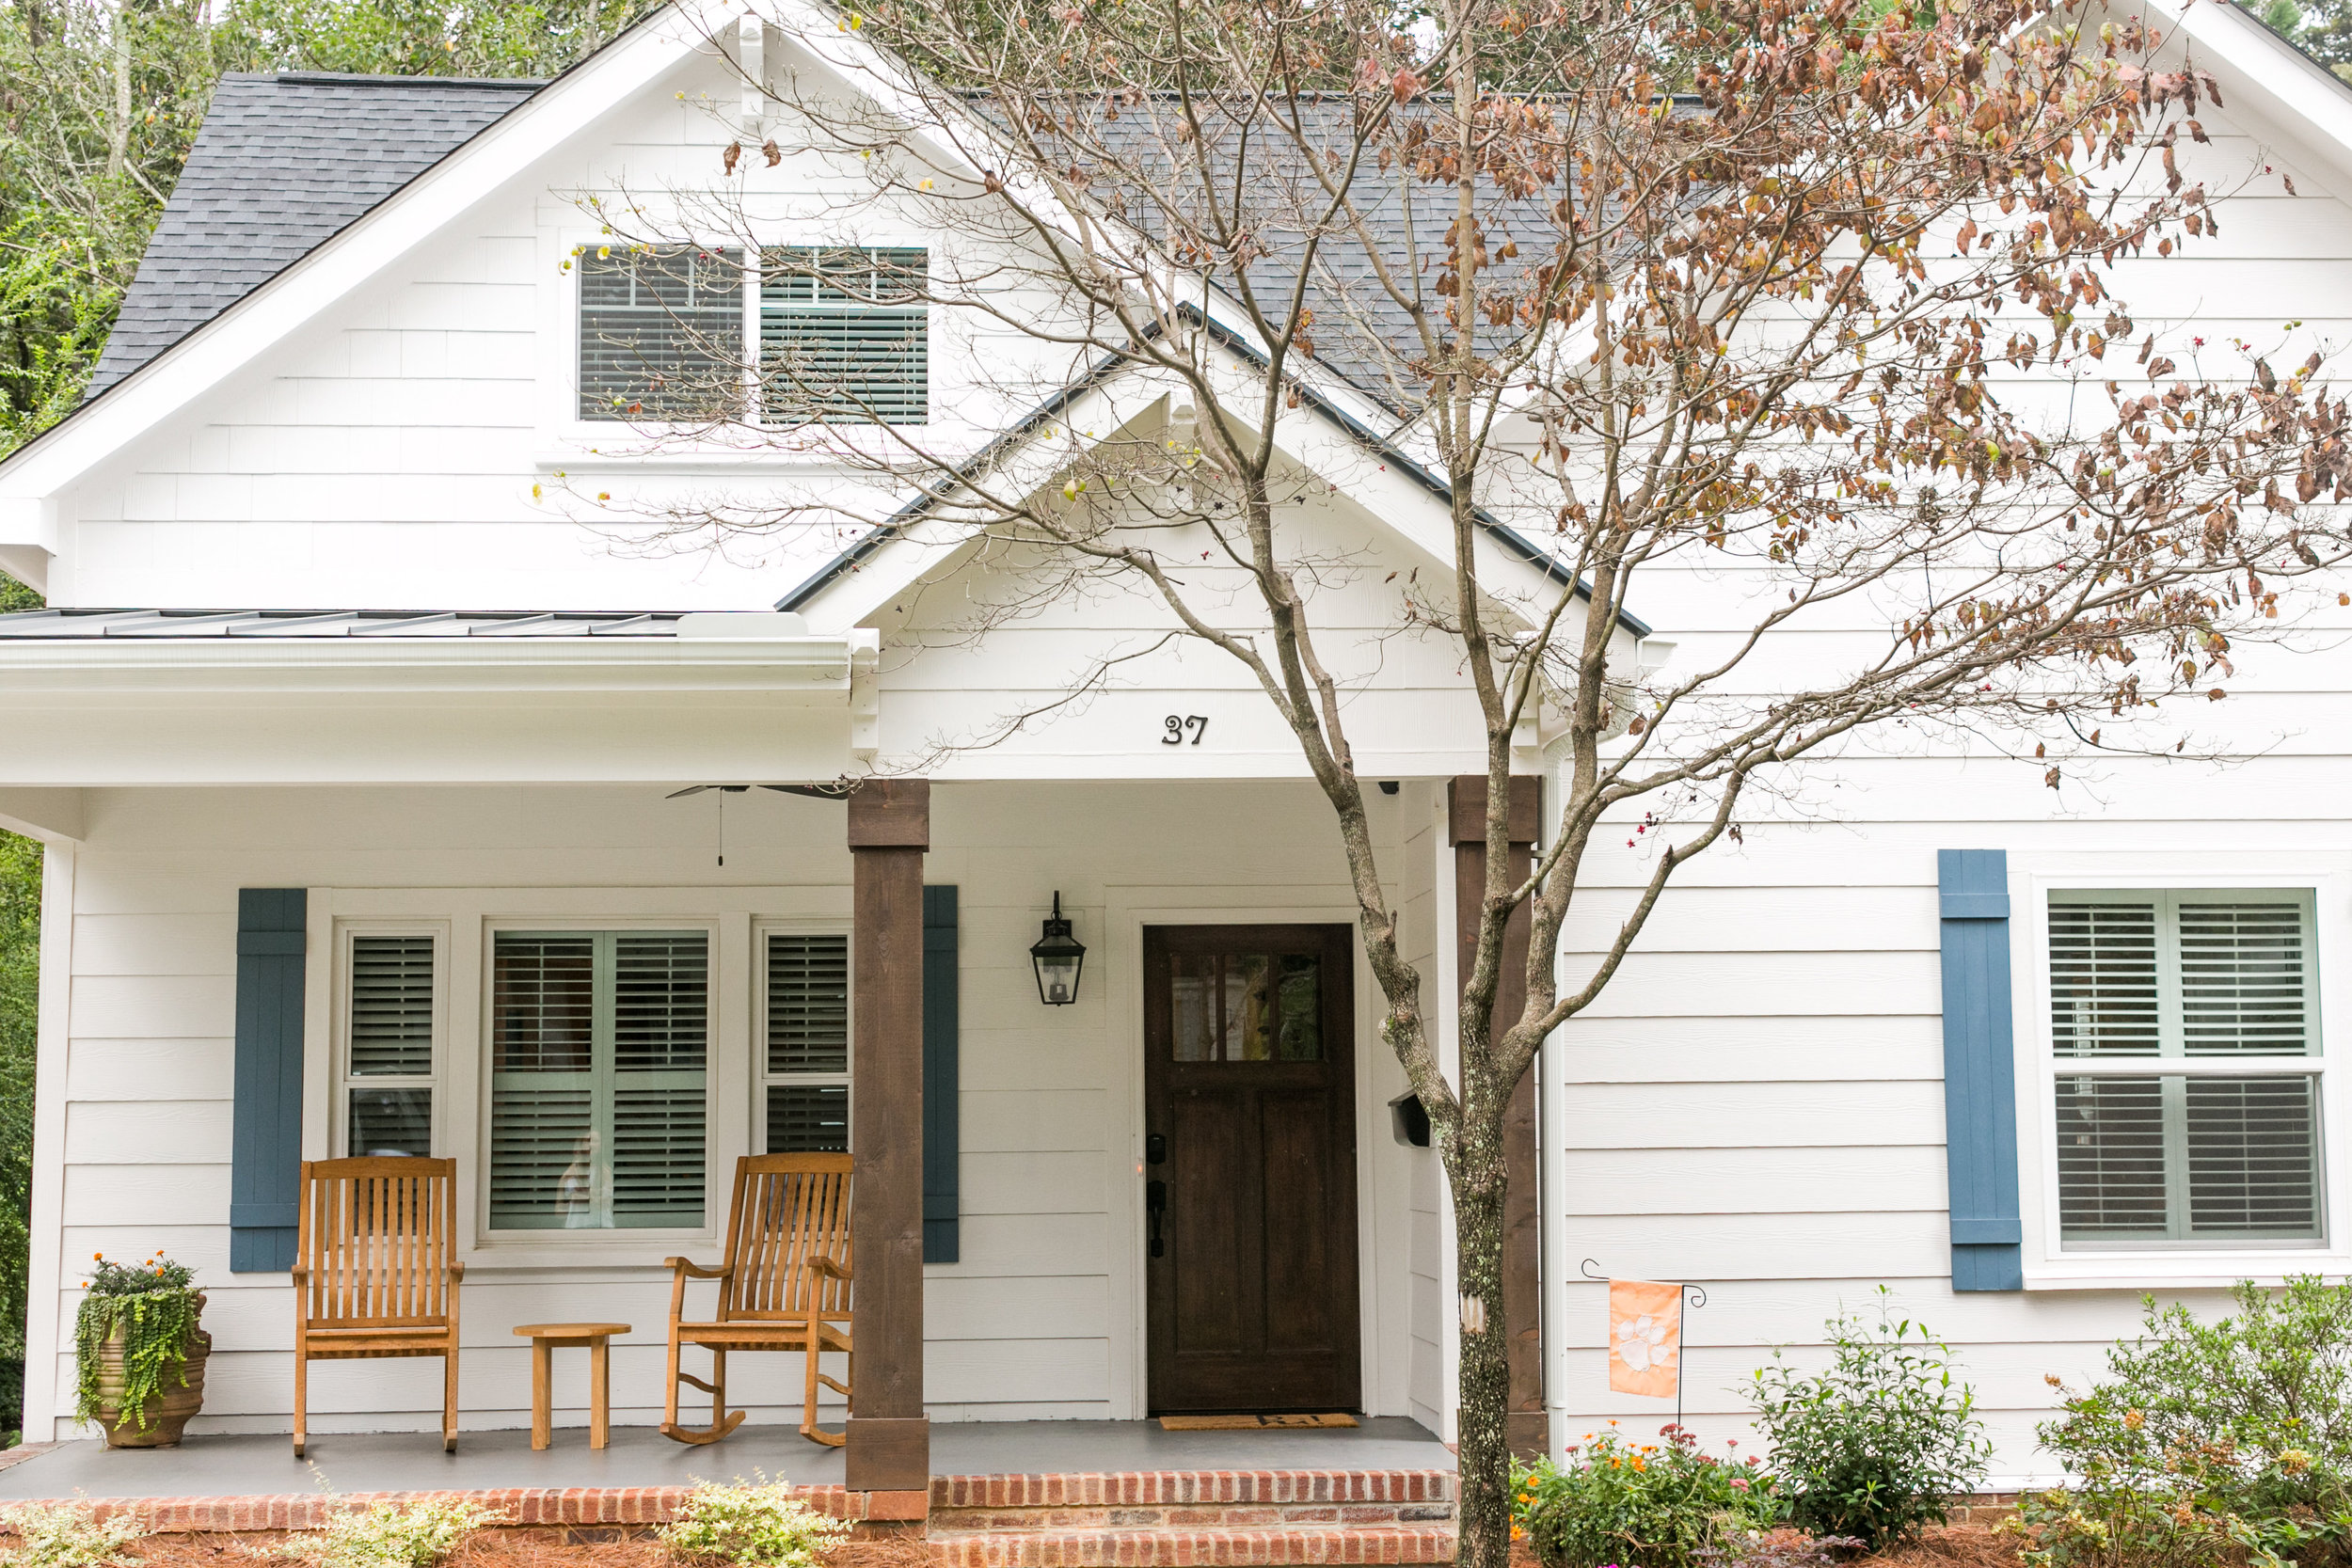
Budde-37.jpg

After

2-story; 4 bed/ 3 bath

As residential designers in Downtown Greenville, the most common addition and renovation project we encounter is what we like to call a “pop-top” design project. This renovation design incorporates adding a second story to an existing one-story home. The design challenge is to ensure that the second floor addition does not overpower the home and impose on the character and quaintness of the other homes in the neighborhood.

The downtown Greenville area maintains its growth and with it, the desire to stay in quaint and cozy neighborhoods. For these homeowners, their current home is location in their perfect locations: a quaint neighborhood with sidewalk streets to walk the dog, close proximity to downtown, and a family-friendly neighborhood.

However, the house needed a transformation to fit their lifestyle and future. The main floor required an open floor plan with a large master on main, including a screened porch for outdoor living space and a second floor consists of three bedrooms with a Jack-n-Jill bathroom with access from the central hallway for guests. The ‘pop-top’ design allowed for additional square footage upstairs but kept the character of the home with some gable dormers.

Elevation Sketch

Elevation Sketch

Floor Plan Sketch

Floor Plan Sketch

Gray quartz countertops on the perimeter of the kitchen cabinetry to highlight the veining in the Calcutta Vintage Quartz island top.

Gray quartz countertops on the perimeter of the kitchen cabinetry to highlight the veining in the Calcutta Vintage Quartz island top.

No wasted space. A built in desk was utilized under the stairwell with a built in drop off bench at the front door.

No wasted space. A built in desk was utilized under the stairwell with a built in drop off bench at the front door.

The back of the desk wall has shiplap to add texture under the stairs with the stained desk top.

The back of the desk wall has shiplap to add texture under the stairs with the stained desk top.

The master bath balances the perfect amount of natural light. Adding transoms above the vanity frames each of the sinks. The back wall accent is painted reclaimed shiplap. The floor tile includes a herringbone floor tile pattern. The mix of chrome a…

The master bath balances the perfect amount of natural light. Adding transoms above the vanity frames each of the sinks. The back wall accent is painted reclaimed shiplap. The floor tile includes a herringbone floor tile pattern. The mix of chrome and black finishes and different textures creates a spa like oasis.

Outdoor Living Area: screened porch with stained tongue and groove ceiling, brick fireplace with reclaimed wood mantel. The oversized hearth adds additional seating.

Outdoor Living Area: screened porch with stained tongue and groove ceiling, brick fireplace with reclaimed wood mantel. The oversized hearth adds additional seating.

Deborah HartmanComment
Your Home for the Holidays

It’s that time of year when you’re most likely thinking about how your family is soon going to be knocking on your door ready to celebrate the holidays. It’s a great time of year! This all means that it’s time to deck the halls. How are you going to get your home ready? How should you decorate? What do you need? We love this topic and helping our clients get holiday ready! Whether you’ve started planning this past summer or you’ve waited until the last minute, we hope that this article can help give you some ideas.

IMG_3868.jpg

1.     Find a uniform theme for your holiday décor and start to add hints of this throughout your home! This year, we’re all about the natural textures and shades of red. We ran with this theme in one home. Want to add some shine? Pick a metal (gold or silver) and run with it!

2.     Confirm your guest count and make room. Now is the time to find all of the chairs you can so that there’s decent seating for everyone. If you’re having a larger cocktail party, not everyone needs to have a chair, but make sure you have enough room available for everyone to congregate and chat. If you have a covered deck or even screened deck, make this space as cozy as possible with some music, ambient lighting, and maybe even an outdoor space heater.

IMG_3875.jpg

3. Set the table. You may or may not be a family who dines in a formal dining room, but if you have a formal dining table at all- dress it up! This is one of our favorite places to really get festive. You can even set out very simple white or ivory dinner settings, but add festive fun with bright linens and some napkin rings. Take it up a notch by adding some greenery and ornaments to your chandelier!

4. Candles, candles, candles! Who doesn’t smell every candle in a home goods store or boutique? We do! This is the best time of year to really let your love of candles shine. Not only can they make your home smell like Christmas, but they also add a beautifully warm, ambient light to any room.

IMG_3876.jpg

5.     Plan for next year! After the holidays are over and the family and friends have cleared out, now may be the time to think about how you could better host your guests next year. Maybe next year you’d prefer to turn that patio or deck into a larger great room? Maybe you’d like to open your kitchen, dining, and living spaces up so that the party is less broken up? Or perhaps you need a new guest room because you’re tired of sleeping on the couch so that your in-laws have a bed? Whatever the case may be, consider what you may need and talk to a professional about how you can achieve those goals for next year!

IMG_3861.jpg
Deborah HartmanComment
With a Little Lowcountry Inspiration...

We have wrapped up another custom home design this summer and we couldn’t be happier to now show it off! This home was designed custom for the lot it’s been built on, which was long and narrow. What better opportunity to employ some Lowcountry architecture and design! We kept that theme in mind throughout every inch of the home from the “haint blue” porch ceilings and doors to the bright and transitional design.

13EastTallulahDrive-1.jpg
13EastTallulahDrive-3.jpg

This large home gives such a perfect bright and open feel, while not overwhelming you with one large expanse of a house that you could hear echoes throughout.

13EastTallulahDrive-4.jpg
13EastTallulahDrive-14.jpg

We decided to go with bright and airy colors to anchor the home and reflect the light that pours in, while also adding some texture with beautiful wainscoting in the front. To add contrast, we introduced gray cabinets in the kitchen, laundry, and pantry. We also added some dark stained beams in the vaulted living room ceiling to draw your attention up, while also adding some beautiful character and contrast to the large space.

13EastTallulahDrive-5.jpg
13EastTallulahDrive-7.jpg
13EastTallulahDrive-13.jpg
13EastTallulahDrive-10.jpg

In the master bathroom, we echoed the haint blue (Tradewind SW6218) on the walls and installed this beautiful tile throughout.

13EastTallulahDrive-16.jpg
13EastTallulahDrive-17.jpg

We kept it mostly neutral upstairs while adding fun pops of light blue and blue/green in the bathrooms. For a home going on the market, you want the rooms to feel open and fresh so that the furniture and style of the individual that will sleep there can make their own mark.

13EastTallulahDrive-22.jpg
13EastTallulahDrive-23.jpg
13EastTallulahDrive-30.jpg
13EastTallulahDrive-29.jpg
Deborah HartmanComment
Waccamaw: A New Kitchen Space

Sometimes a renovation project doesn't necessarily require taking down walls and expanding into new spaces. Sometimes it means taking what is existing and giving it a new 'facelift'. 

This home's character was evident in every space! The kitchen only needed a few adjustments to make it more inviting and open for entertaining and family get togethers. 

Before: The hood blocked the natural light coming in from the picture windows on either side. The hood stretched from the countertop to the ceiling, making the cooktop space fully enclosed. 

Now: A new floating hood design allows the natural light from either side to filter through the space. The entire wall was fit for marble subway tile and the new hood was painted white with a small accent to tie in with the island. 

VZ-3.jpg
VZ-1.jpg
VZ-5.jpg

The existing perimeter countertops remained, but only to make way for a beautiful island countertop and create the perfect contrast between the perimeter cabinets and island. 

VZ-10.jpg
Countertop: White Macaubus Quartzite

Countertop: White Macaubus Quartzite

The island countertop continues over here to the wet bar; the backsplash features a marble mosaic. The hammered wet bar sink adds even more texture. Cabinets are painted SW Black Fox. 

The island countertop continues over here to the wet bar; the backsplash features a marble mosaic. The hammered wet bar sink adds even more texture. Cabinets are painted SW Black Fox. 

In addition to a kitchen renovation, no project is complete without a new perfect laundry/mudroom space. This laundry room is complete with new custom cabinets and colors that just might make laundry a fun part of the day! 

VZ-17.jpg

A reason for custom cabinetry design is so that every nook and cranny can make way for every storage need. If you take a close look, the dog bowl pull-out creates the perfect space for the pup's dinner, however there's no mess or tripping over dog bowls during the day when guests are over! 

The cabinet paint is SW Halcyon Green. The cabinet knobs are from Emtek in a brass finish. 

The cabinet paint is SW Halcyon Green. The cabinet knobs are from Emtek in a brass finish. 

The apron front sink adds character and a large cleaning basin for the laundry room. The countertops are butcher block. Instead of a marble pencil or bullnose at the top of the marble backsplash, remnants of the butcher block were added above the mo…

The apron front sink adds character and a large cleaning basin for the laundry room. The countertops are butcher block. Instead of a marble pencil or bullnose at the top of the marble backsplash, remnants of the butcher block were added above the mosaic tile for a clean and well paired look. 

Deborah HartmanComment